Go from a new organization to a roster agent with a template, one evaluation category, one trigger and a graded run. Read this first; it introduces the dashboard flow and the runtm-api CLI.
By the end of this page you will have one agent that has a job, a way to measure it, a place to run, a trigger, and a first graded run on the scorecard. It takes about ten minutes.
New organizations land on the Quickstart page. The third step, Set Up Your First Agent, asks a short set of questions and builds the agent with you.
The Quickstart page: create an organization, invite the team, then set up the first agent.
The questions map directly onto the first steps of building an agent:
Question you are asked
What it decides
What do you do? (Support, Data, Engineering, Ops, Leadership)
Which agent archetype to start from.
What should Runtm take off your plate first?
The job. This becomes the agent’s description and the first line of its instructions.
Which tools from your stack
Which tool providers to prepare (Zendesk, Stripe, Postgres, Datadog and others appear as ready-to-connect cards).
Where should this agent live? (Slack, Email, Runtm dashboard)
Which trigger to connect.
Roughly how big is the team this would help?
Sizing hints only.
When you click Set this up, Runtime creates a template named after the agent, a roster agent whose default template points at it, a runbook skill attached to the template, one “Connect X” card per tool you named, and a setup session where the agent finishes wiring itself. A Finish your setup checklist inside that session tracks the remaining connections (GitHub App, Slack app, email inbox, tool credentials).If you prefer to see every piece, follow the manual path below. It creates the same objects.
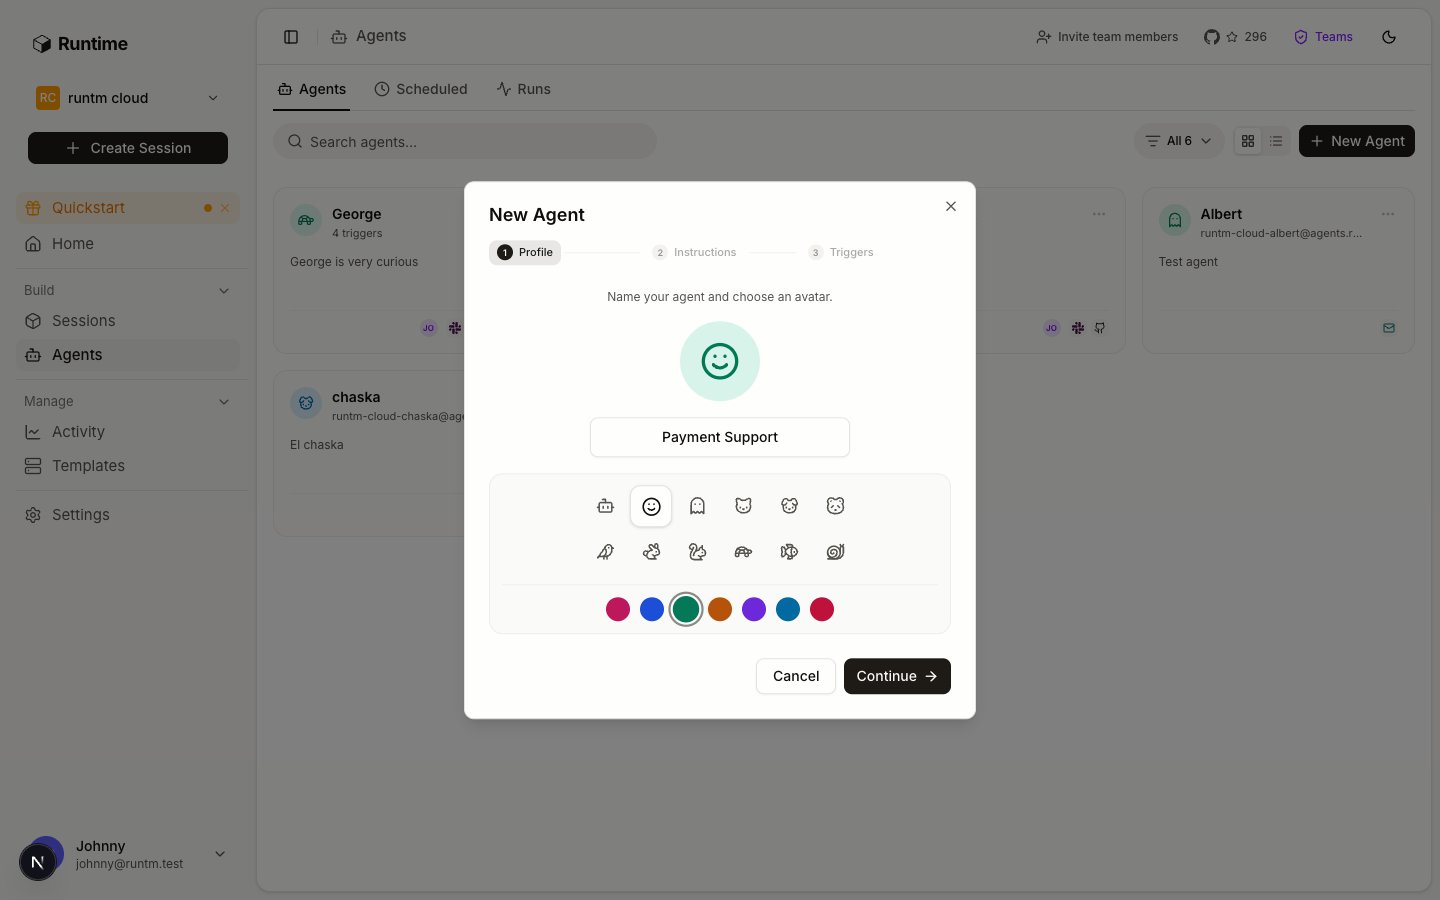
Go to Agents and click New Agent. The dialog has three steps: Profile, Instructions, Triggers.
New Agent, step 1: name and avatar.
On Profile, name the agent (for example Payment Support). On Instructions, write a one-line Description that states the job, and System instructions that say how to do it and what never to do. Skip Triggers for now and click Create agent.A good first description names the input, the output, and the boundary: “Given a Zendesk ticket about a charge, reconstruct the payment timeline from Stripe and the ledger and draft a customer reply. Never send it.” See Define the job.
2
Give it a place to run
Open the agent (click its card) and set Default template. If you have no template yet, go to Templates > New Template, choose Blank environment, name it, and click Create Template. A blank template boots with your org’s skills and tools and nothing cloned.Tools, MCP servers and secrets attach to the template, not the agent. Give it tools covers connecting Zendesk, Stripe and a read-only database.
3
Add one evaluation category
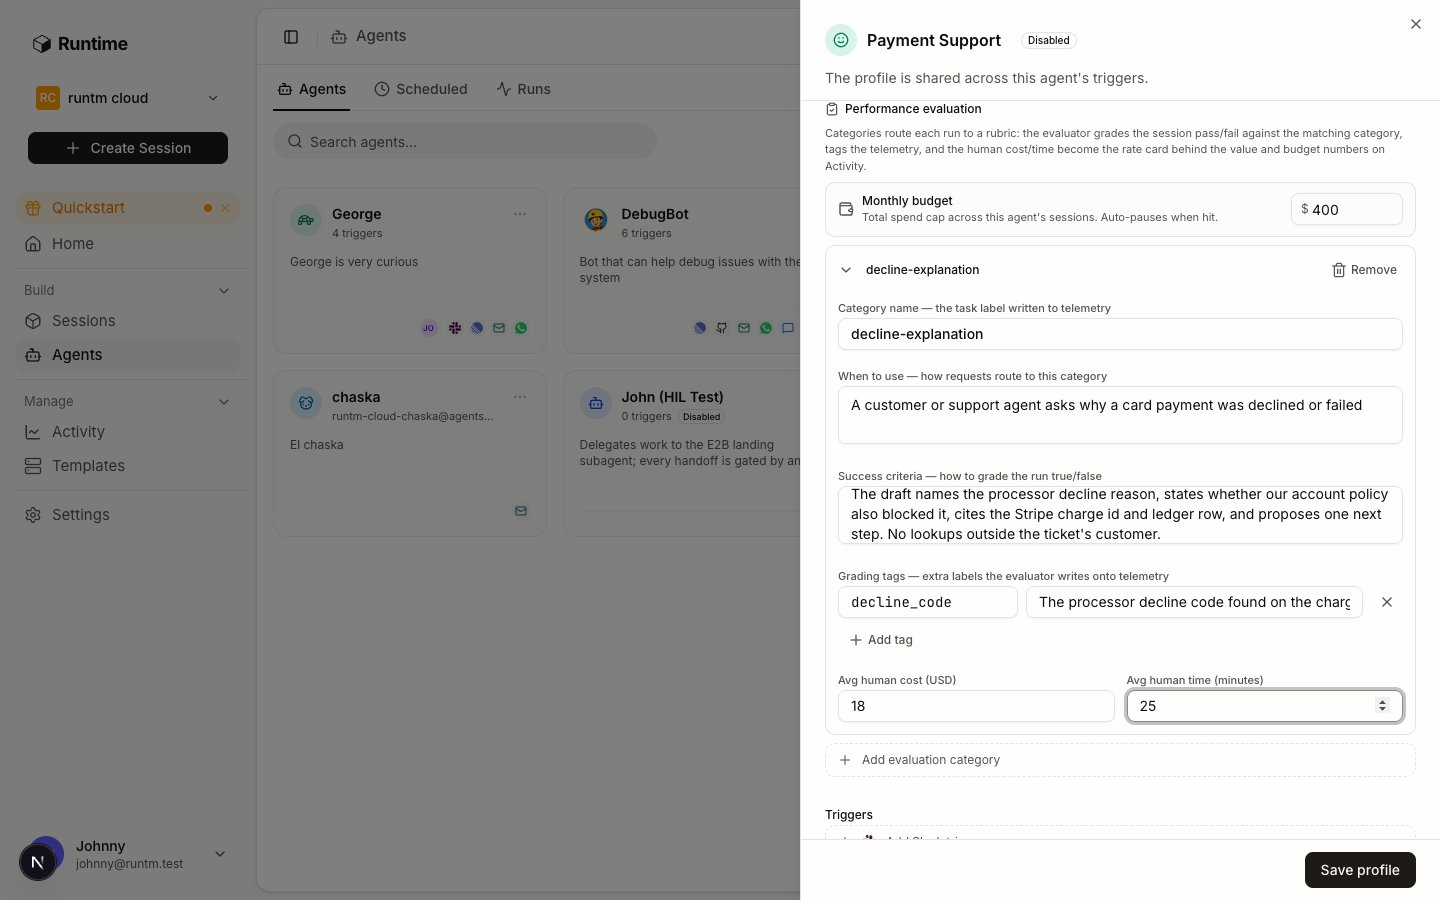
Still in the agent’s Profile tab, scroll to Performance evaluation and click Add evaluation category.
One evaluation category: what it is called, when it applies, and how to grade it.
Fill in a category name (duplicate-charge), when to use it (“the customer reports being charged twice for one order”), and the success criteria (“the draft cites both charge IDs, states which one settled, and proposes the refund amount”). Add Avg human cost (USD) and Avg human time (minutes) so the scorecard can value each success. Click Save profile.Without at least one category, runs are never graded and the scorecard shows zeros. See Measure success.
4
Connect a trigger
In the agent’s sheet, under Triggers, add one:
Email is the fastest: click Create inbox and Runtime mints an address like [email protected]. Emails to it start a run; the reply comes back in the same thread.
Slack installs an app into your workspace so people can @mention the agent in a channel or DM it.
Every trigger uses the agent’s default template and instructions unless its own settings tab overrides them. See Triggers.
5
Run it once
Send the agent a real case. Email the inbox, or mention it in Slack:
@Payment Support Customer on order #48213 says they were charged twice. Ticket 88231.
The run appears under Sessions (and under Agents > Runs). Open it to watch the agent work, or wait for the reply in the thread.
6
Read the grade
A few minutes after the run finishes, open Activity > Agents. Your agent shows one graded run, whether it passed, and the value returned based on the human cost you entered.If the run failed the grade, the reason tells you why. Tighten the success criteria or the instructions and send the next case. See Prove it works and iterate. Guardrails come after the agent passes its cases: Add guardrails and approvals.
Every step above is one runtm-api command. Coding agents use this CLI to build and operate other agents; this is the only page in Documentation that shows it in full, so you know it exists.
curl -fsSL https://runtm.com/install | bashexport RUNTM_API_KEY=runtm_... # an org-scoped key from Settings > API Keysruntm-api template create --display-name "Payment Support" --github-repo <owner>/<repo> --skip-agentruntm-api agents create --name "Payment Support" \ --description "Reconstructs disputed charges from a ticket and drafts a reply, never sends" \ --instructions "$(cat instructions.md)" \ --template payment-supportruntm-api agents update <agent_id> --evaluator-criteria "$(cat rubric.json)"runtm-api agents create --type email --name payment-support --agent-id <agent_id>runtm-api agents scorecard --days 7
Every Build and Guides page carries the CLI equivalent of each dashboard step in an agent-only block (hidden on the website, present at the .md URL), so an agent reading https://docs.runtm.com/<page>.md can lift the exact command. Lines start with cli: (run it), cli-verify: (check it worked) or cli-handoff: (a URL to give a person, for steps like entering a credential that an agent must not do). The full command table is on the Agent CLI page.